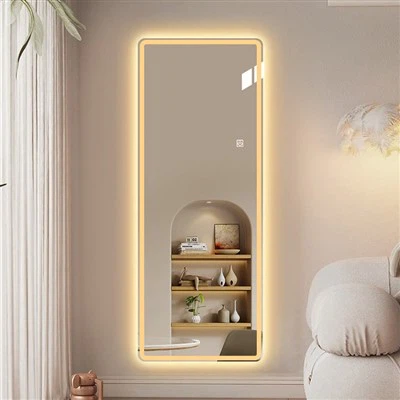
Why decorate a full-length mirror?
A full-length mirror is an indispensable and practical item in home life. It can not only help to organize your appearance, but also improve the brightness of the interior space by reflecting light. However, most full-length mirrors on the market are modern designs with simplicity as the main feature. In order to meet the public's ideas, they generally lack their own unique designs.
If you use DIY design, you can not only make the full-length mirror more in line with your personal style, but also make the full-length mirror a highlight of home decoration. Whether it is giving a new life to an old mirror or adding unique elements to an ordinary mirror. DIY decoration can bring unexpected results. At the same time, compared with buying advanced custom mirrors, DIY is more economical.

DIY Decorating a Full-Length Mirror
Cleaning and Preparation
Before you start DIY, make sure that the mirror and the work environment are properly prepared:
Cleaning the Mirror
Wipe the mirror surface with a damp cloth or glass cleaner to ensure that there is no dust, fingerprints or stains. If it is an old mirror, you can wipe the frame with a damp cloth to remove accumulated dust and oil.
Protect the Mirror
Cover the mirror surface with tape or old newspapers to prevent it from getting dirty or scratched during the decoration process.
Prepare the work area
Lay an old cloth or waterproof mat on the floor or table to prevent glue or paint from contaminating the furniture. Make sure that tools and materials are within easy reach for easy access.
Fixing the decorative materials
According to the selected decorative style, follow the steps below to fix the decorative materials:
Measure and mark
Measure the length of the side of the frame with a ruler and mark the fixing points of the decorative materials on the frame to ensure that the design is symmetrical and uniform.
Cutting and preparing materials
According to the measurement results, cut the wood strips, rattan, ropes and other materials to ensure the right size. If you need to paint or distress, you can do it in advance and let it dry in this step.
Paste and fix
Use a hot melt glue gun or double-sided tape to fix the decorative materials to the frame one by one. If you use heavier materials (such as wood strips or metal sheets), it is recommended to use a nail gun or super glue to increase stability. For small decorations (such as beads and shells), you can use tweezers to assist in pasting to ensure accuracy and beauty.

Detail adjustment and finishing
After completing the main decoration, make the following detail adjustments to make the work more perfect.
Check the bonding firmness
Check whether each decorative part is firm to avoid looseness or falling. If you find that the bonding is unstable, you can re-reinforce it.
Trim and adjust
Use scissors or a utility knife to trim the excess material to make the overall edge neat. Adjust the arrangement and angle of the decorations to ensure visual balance.
Clean the surface
Carefully tear off the tape or newspaper covering the mirror surface to avoid leaving glue marks. Gently wipe the mirror surface and frame with a damp cloth to remove dust or glue residue.
Protection and fixing
If long-term use is required, a layer of transparent protective paint can be sprayed on the decorative material to improve durability. Make sure the back support or hook of the mirror is stable to avoid unstable installation due to increased weight.